I bought one of these boxes on the spur of the moment and then thought that I would probably never have the patience to actually do something with it.
However, over a few days I started to think about what I would like to do and decided to make something that had a "things that fly" theme. This meant I could enter it for the following challenges:
A Vintage Journey - things with wings
Fashionable stamping challenges - birds and bees
That's crafty challenges - birds
Scrap it girl - things with wings
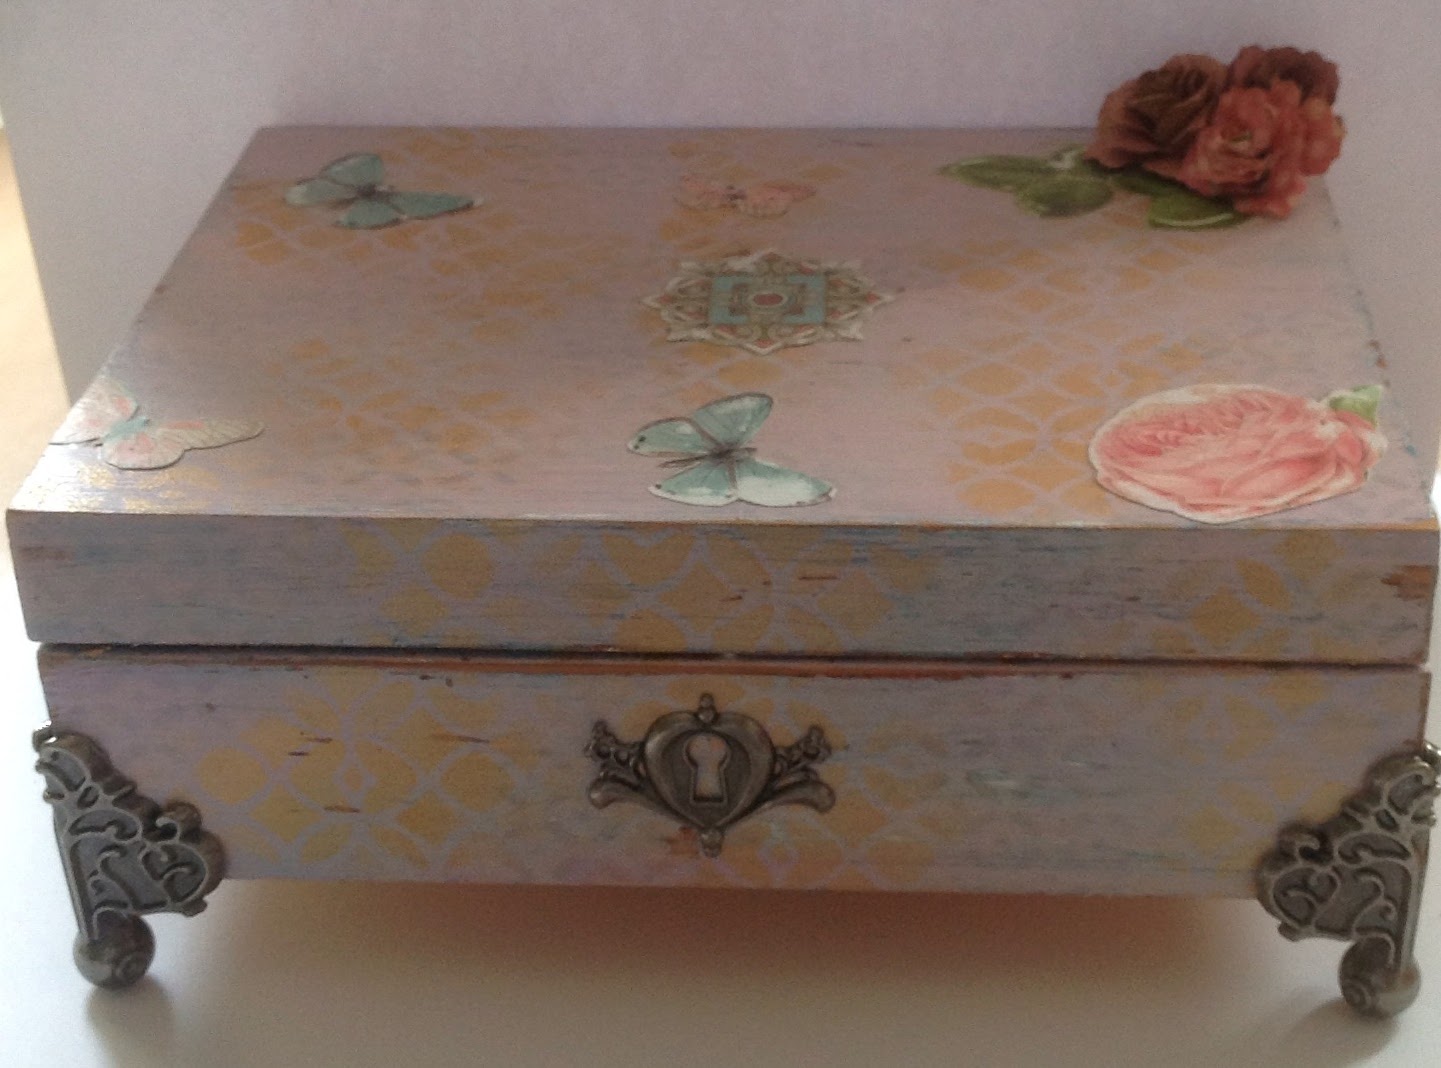
I have been playing about with some of the tutorials in Tim Holtz' book A Compendium of Curiosities 3 and I wanted to use his layering stencils and distress paints for much of this project.
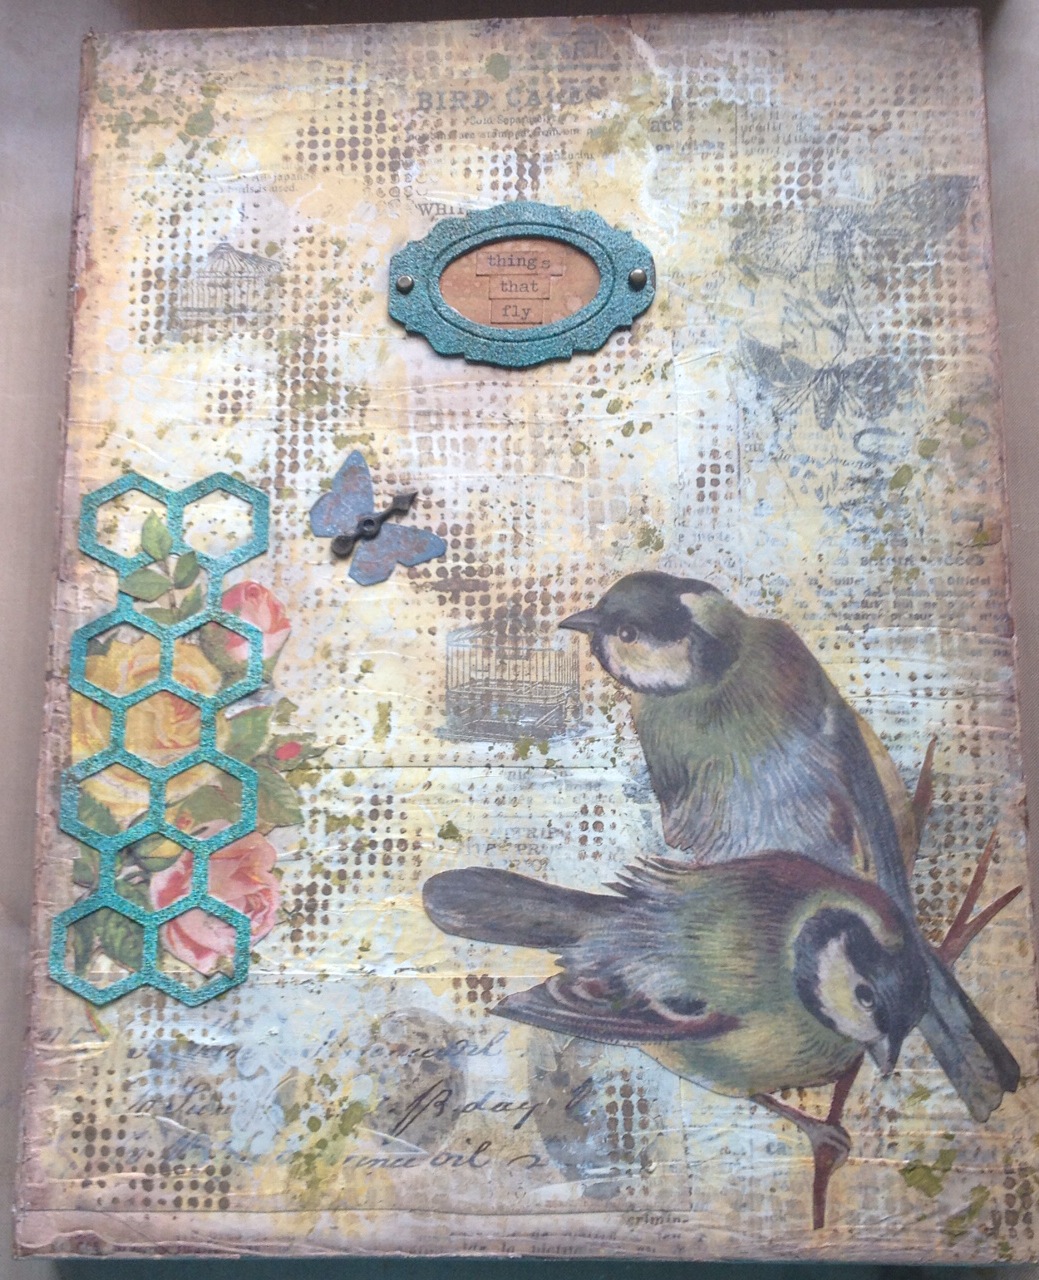
On the outside covers I started by putting a layer of decoupage paper, this had a newspaper print design. I then added bits of various papers which had birds or butterflies. I added some gesso to give it all a bit of texture and then I painted different shades of distress paint. The next thing I did was to use different layering stencils to add colour and texture. Finally, I cut out some birds from Tom Holtz' Wallflower paper, added a trellis, which was embossed with rangers verdigris powder and a frame for the book's title .
This is what the front cover looks like:


However, over a few days I started to think about what I would like to do and decided to make something that had a "things that fly" theme. This meant I could enter it for the following challenges:
A Vintage Journey - things with wings
Fashionable stamping challenges - birds and bees
That's crafty challenges - birds
Scrap it girl - things with wings
I have been playing about with some of the tutorials in Tim Holtz' book A Compendium of Curiosities 3 and I wanted to use his layering stencils and distress paints for much of this project.
On the outside covers I started by putting a layer of decoupage paper, this had a newspaper print design. I then added bits of various papers which had birds or butterflies. I added some gesso to give it all a bit of texture and then I painted different shades of distress paint. The next thing I did was to use different layering stencils to add colour and texture. Finally, I cut out some birds from Tom Holtz' Wallflower paper, added a trellis, which was embossed with rangers verdigris powder and a frame for the book's title .
This is what the front cover looks like:
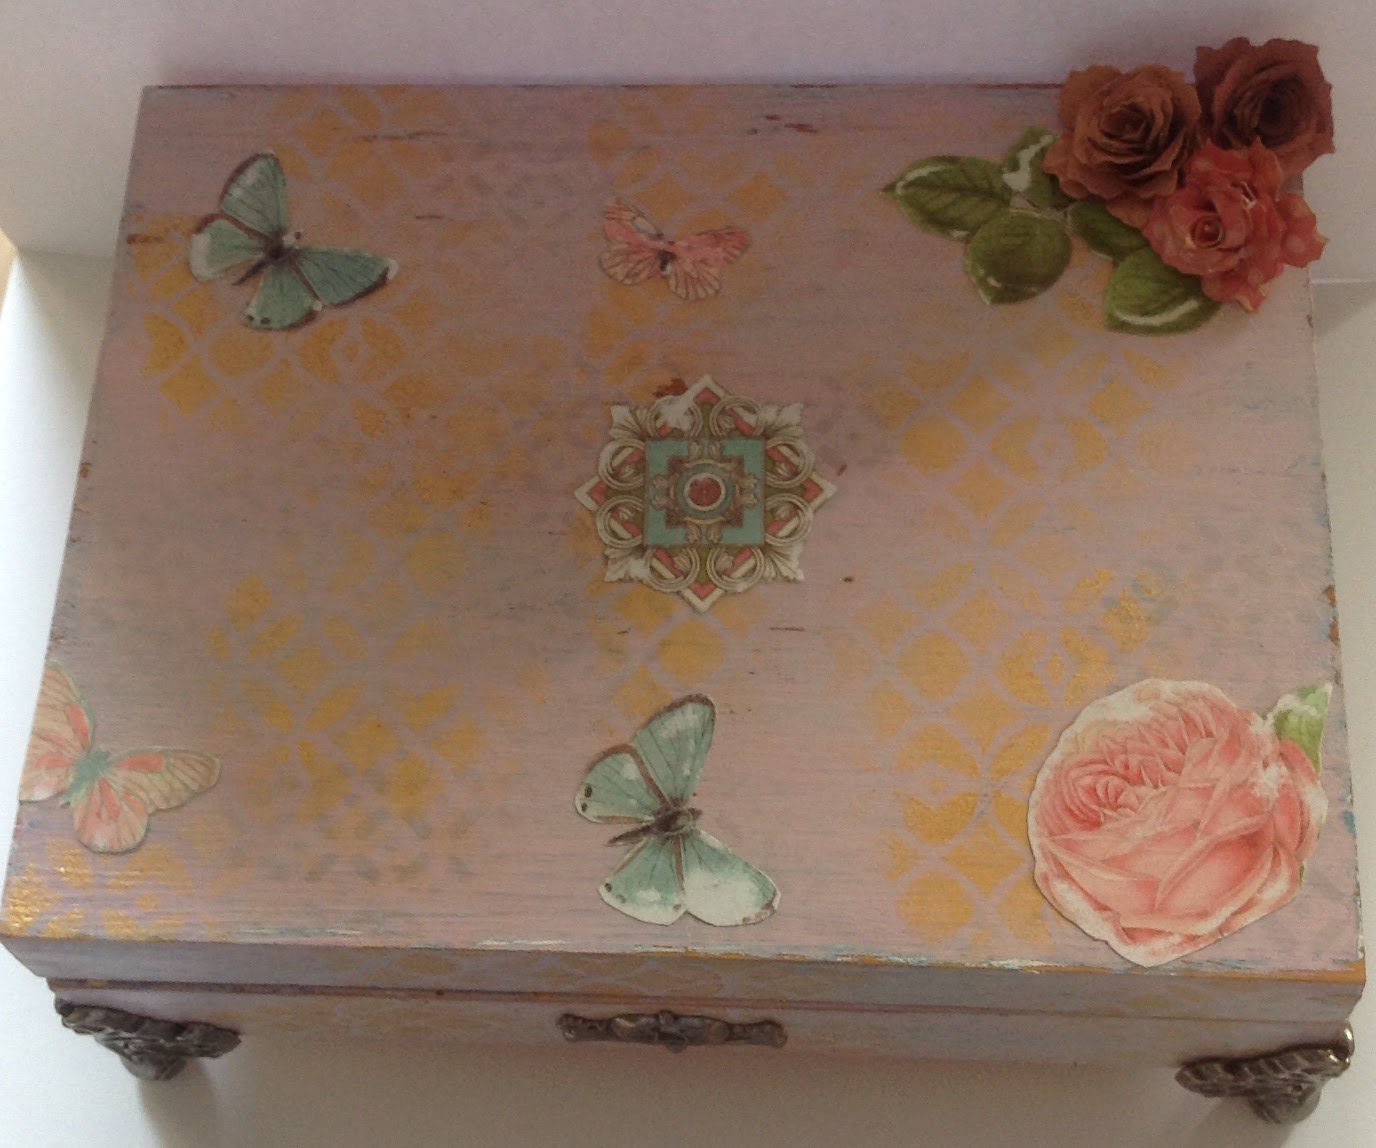
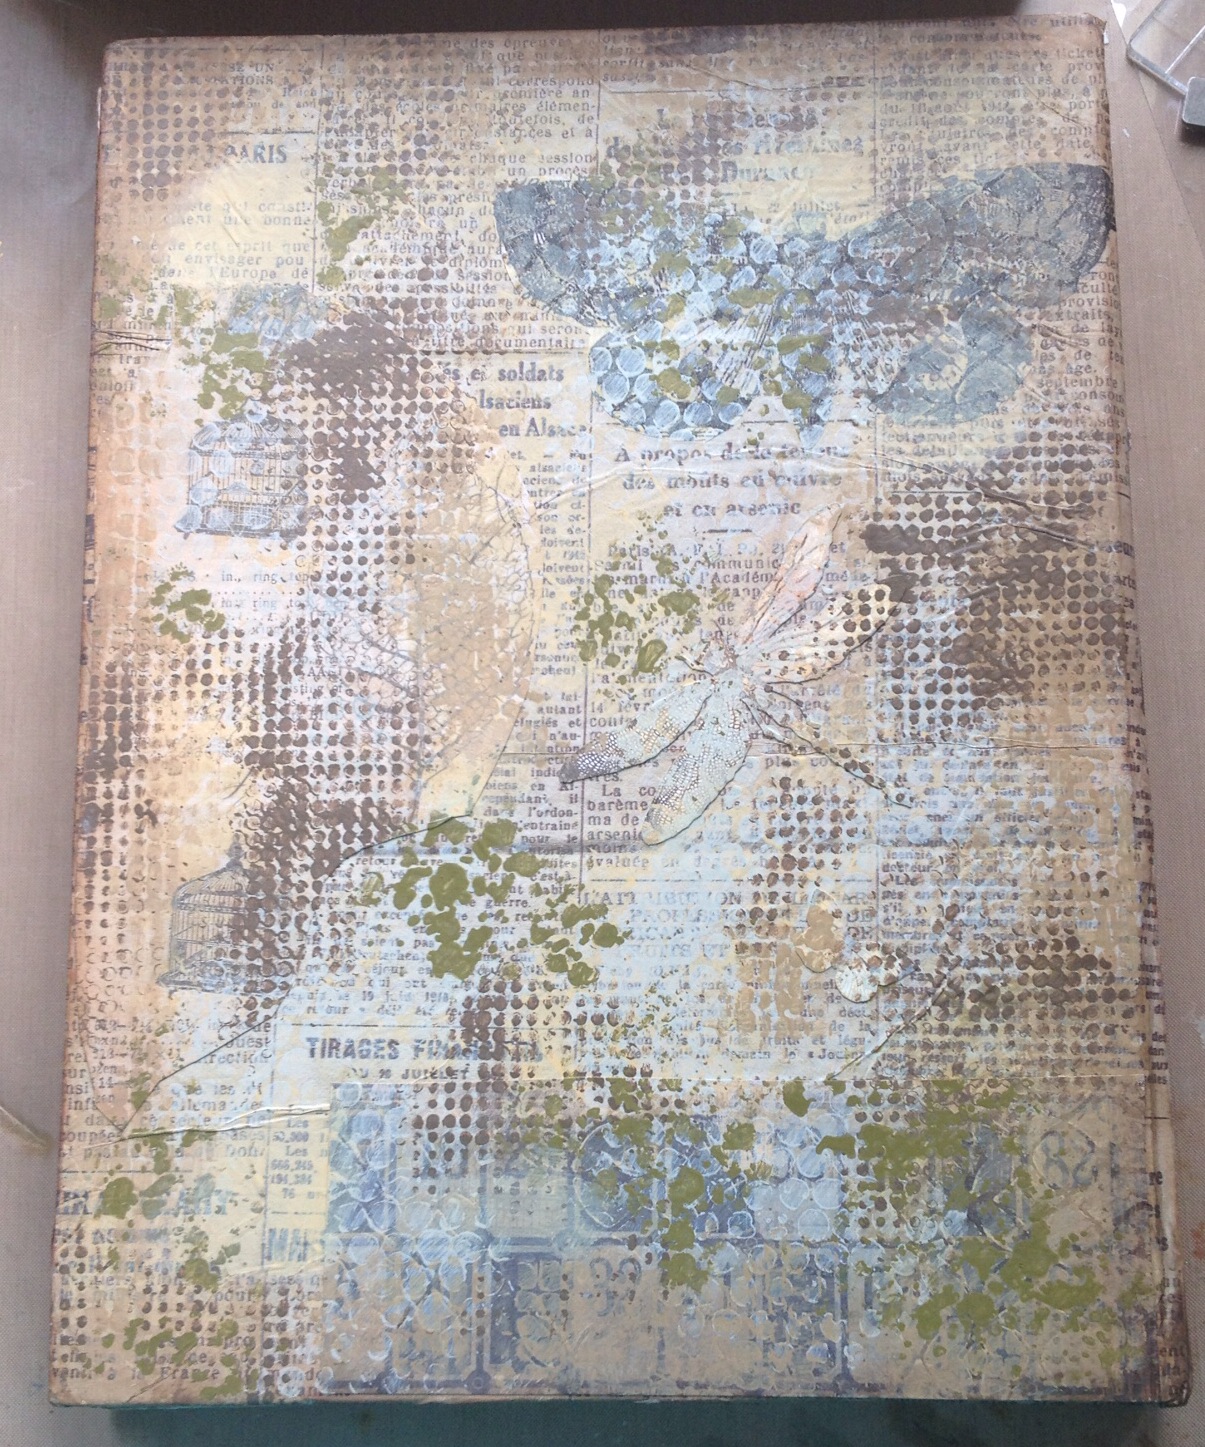
This is a picture of the back of the box:
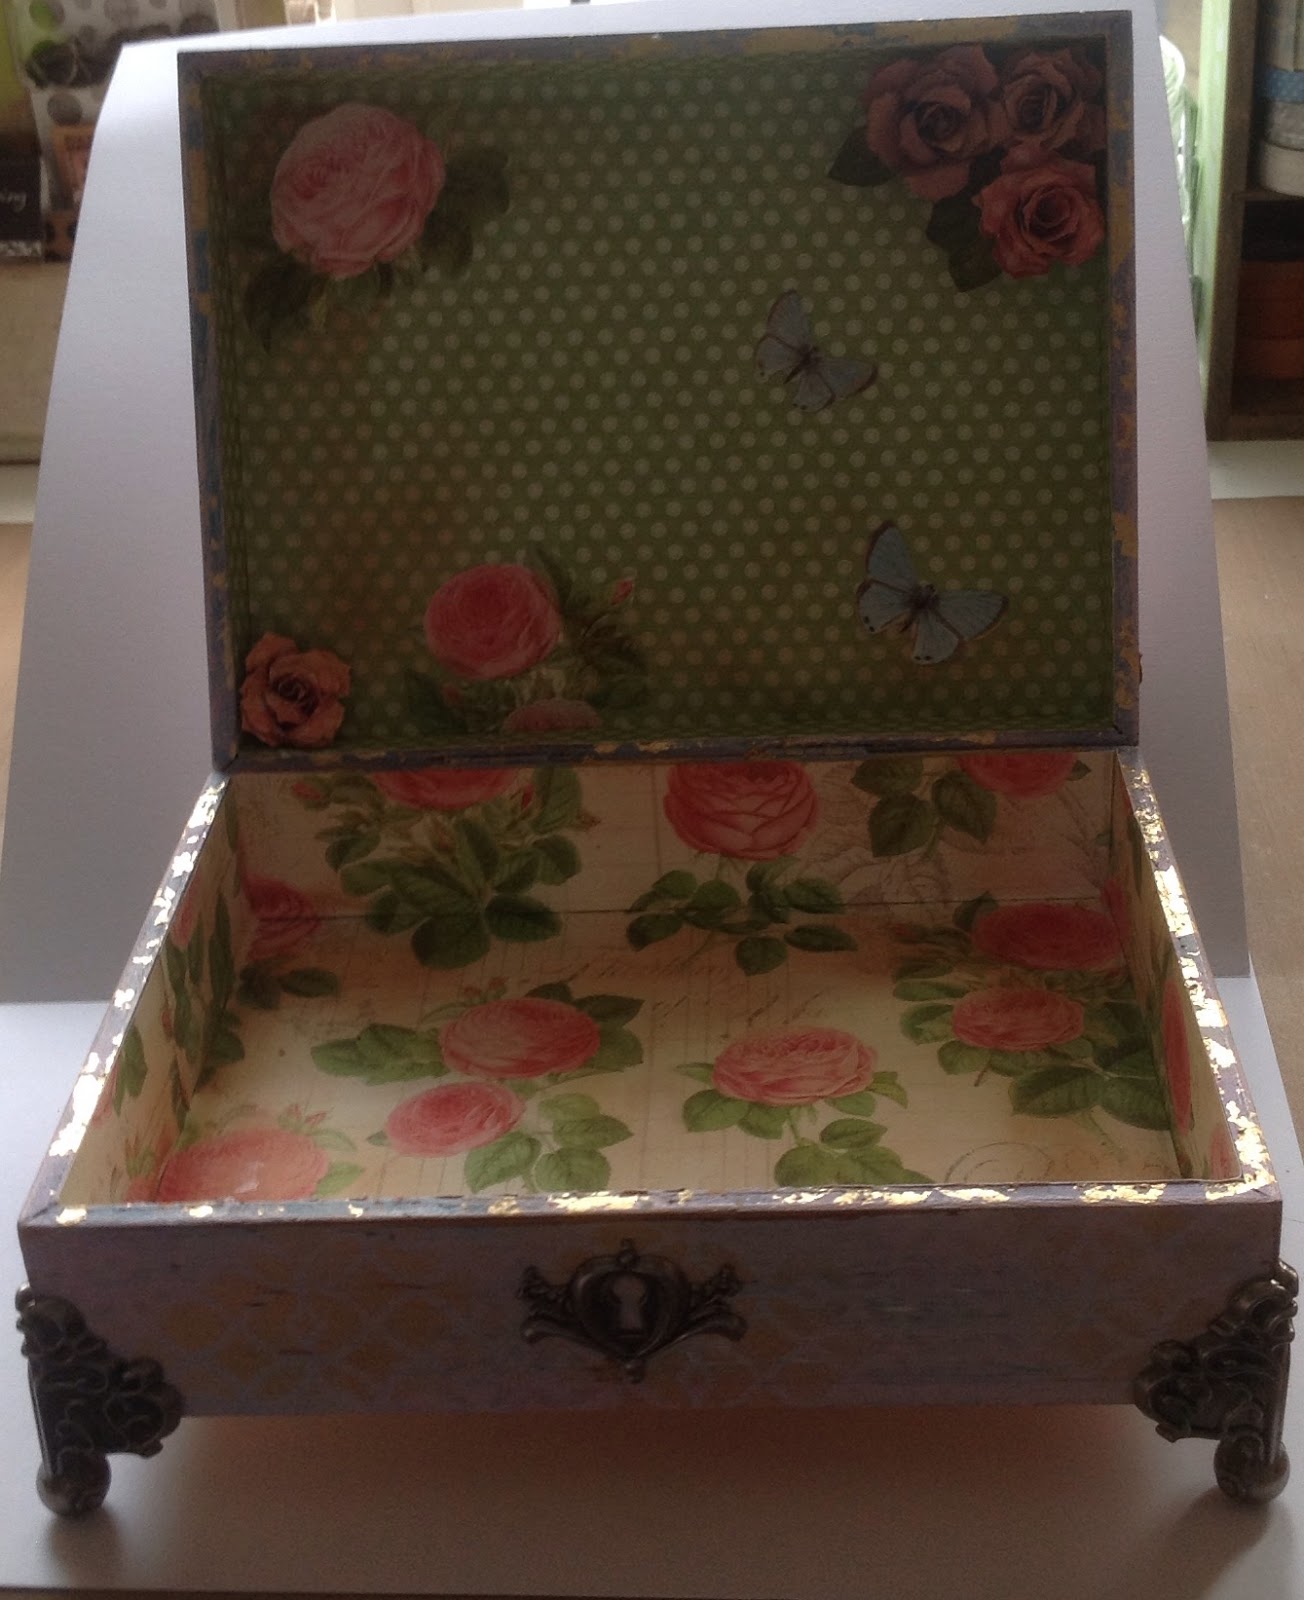
On the inside cover I used another paper from the Wallflower range and, again added DI paints using layering stencils. On the actual inside I used vintage brown crackle paint on each of the inner boxes. Each box then had something that is connected to something that flies.
I absolutely loved doing this project and it has inspired me to do one for each of my grandchildren each of which will focus on something that they are interested in. I think there will be a lot of dinosaurs, pirates and princesses involved!